Introduction
This post describes how to get started and set up for making contributions to the Gapcoin project community web site, such as making changes or creating new posts and how to trigger the published Gapcoin Project community web site to be automatically updated with the changes/additions.
Description of the tech stack on which this web site is built
This is a quick rundown of the technology that underpins the Gapcoin Project community web site, an informal description that sets a broad context because most of the stack simply disappears into the background for the vast majority of web site tasks.
To assemble the stack and use it locally to test your changes/additions to the web site content, you’ll need to install Jekyll (along with the recommended Jekyll support utility, “Bundler”) and git. Both provide installation packages and extensive documentation.
1. Github Pages
This web site is a “Github Pages” web site, hosted directly from the Github Gapcoin Project organisation’s repository, for free (atm), by Github (now courtesy of Microsoft) as part of their standard set of services that they provide to the FOSS community.
As illustrated in the video, Github pages web sites are static web sites that are automatically rendered from (gh-pages) repository contents in response to a pushed commit to the repository.
2. Jekyll
GH-pages supports static web sites built with Jekyll, a static site generator with built-in support for GitHub Pages. The Gapcoin Project community web site is is just such an instance and was created by following the extensive instructions provided by Github on Setting up a GitHub Pages site with Jekyll.
3. OpenTheme
Jekyll supports adding a theme to the build which automatically provides overall consistent stying for the web site. In this instance, I have chosen the six year-old FOSS contribution “OpenTheme” for its utility and the fact it supports the (equally elderly) Semantic-UI CSS framework.
4. Semantic-UI
Not much to say about this, it’s rather a good and stylish CSS framework, no longer being worked on but worth using anyway. There is a currently-maintained successor, Fomantic-UI should a switch to a supported version be deemed necessary or desirable.
One of the advantages of Jekyll’s approach is that Markdown and HTML can be mixed in the same source, so if the content requires it, specific Semantic-UI elements can be included - such as this info message:
Which is quite cool - and rather useful.
5. git, a free and open source distributed version control system
A git repository is a time-preserved collection of files of the various different versions of a project. These files are imported from the remote repository into the local filesystem of the user for update and modification. The process of copying the content from an existing remote git repository is termed “cloning”. Once the repository has been cloned, the user has the complete repository locally.
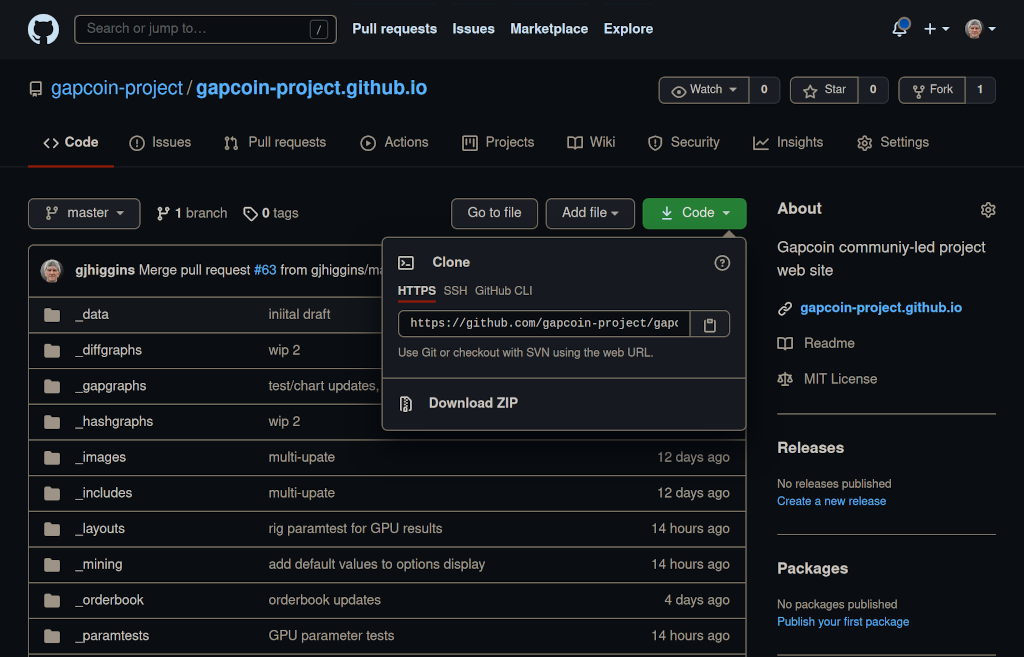
The Github repository https://github.com/gapcoin-project/gapcoin-project.github.io is the current primary location of the Gapcoin Project’s community web site repository, navigating to that URL shows GitHub’s visual presentation of the files and folder structure.
It all looks very complicated with lots of cryptic options but fortunately, the core operations needed to work as a contributor with the Gapcoin Project community website’s git repository are quite straightforward.
The role of the tech stack in reducing maintenance effort
The advantage of using a static site generator application such as Jekyll is that the task of content generation and content maintenance is greatly simplified.
The Liquid templating engine takes care of updating index pages to the extent that adding a post such as this merely entails the creation of a single file containing the content that is saved in the appropriate folder _posts/projectdocs as 2021-05-05-care-and-maintenance.md.
When the change is committed and pushed to the repository, the Liquid templating engine updates the /posts index page to show the newly-created post’s title, description and date.
From a contributor’s perspective, the only element of this stack that is exposed (i.e. worked with) is the GitHub Pages aspect, i.e. some small degree of familarity with git is required.
Working with the Gapcoin project community web site repository
Step 1. Forking the main repository
A fork is a copy of a repository. Forking a repository allows you to freely experiment with changes without affecting the original project.
By convention, contributors to FOSS projects on Github typically create a “fork” of the repository in the contributor’s personal area and then they clone that repository to work on - with the ultimate goal of being able to create a “Pull Request” to the main repository, enabling contributions to be managed in a reasonably elegant fashion.
There’s a specific button for this on Github (top right of the image, labelled “Fork”).

Sign up to Github, navigate to https://github.com/gapcoin-project/gapcoin-project.github.io and click on the “Fork” button. Github does the rest, you can sit back and watch the forking magic. When it’s finished, you’ll be taken to your freshly-created copy of the Gapcoin Project community web site repository.
Step 2. Cloning your repository
In this section, I’ll be using Linux command-line examples for clarity and to take advantage of the fact that the command-line examples are common to all OSes.
To “clone” a repository effectively means importing the files from the remote repository into the local filesystem for update and modification. Cloning is achieved via using the git command-line tool.
$ cd ~/Projects
$ git clone https://github.con/gjhiggins/gapcoin-project.github.io
$ cd gapcoin-project.github.io
This will copy all the files that make up the latest version of the community web site in a local folder called gapcoin-project.github.io and the structure will be the same as that shown by https://github.com/gapcoin-project/gapcoin-project.github.io.
Obviously, there’s a lot there and in a subsequent post I will describe the detailed workings of the way that the Jekyll application constructs the published Gapcoin Project community web site but for this article, I’ll concentrate on creating basic content contributions.
Creating a basic new blog post
The _posts folder is where the blog posts live. The Gapcoin Project community web site uses five subfolders to establish separation of content topic and to make maintenance easier: _posts/blog, _posts/gapreport, _posts/mining, _posts/primegaplist and _posts/projectdocs.
Posts are typically written in Markdown but HTML is also supported.
To create a blog post, add a file to the _posts/blog directory with the following filename format: YEAR-MONTH-DAY-title.MARKUP, where YEAR is a four-digit number, MONTH and DAY are both two-digit numbers, and MARKUP is the file extension representing the format used in the file (e.g. md or html). For example, the following are examples of valid post filenames:
2021-05-02-record-gap-gaps.md
2021-04-19-primorial-offsets.md
2021-04-19-example-post.html
All blog post files must begin with front matter which is used to set a layout and other meta data. In the example shown below, the key:value pairs sandwiched between the triple-dashed lines form the front matter:
---
layout: post                         # Specifies a “post” layout
author: Graham Higgins               # Author name, not really used atm on this site
title:  Starter Post                 # Title used in HTML Meta, Post Header, Recent Posts list
description: Example of a blog post  # Description used in HTML Meta, Post Header, Recent Posts list
category: projectdocs                # Category to relate multiple posts to a topic
tags: content                        # Tags to relate multiple topics to a post
---

Your text here.
As for the actual text content, it’s probably easier to write in Markdown, both basic syntax and extended syntax is supported.
A “Starter post” blog page exists (courtesy of the OpenTheme creators) and there are many examples in the Gapcoin Project repository (accessible either locally, if the repository has been cloned or remotely on Github, here’s one example).
Running Jekyll locally
There’s extensive documentation for testing your GitHub Pages site locally with Jekyll which I won’t repeat here. I’ll assume you have followed the recommended path of installing Jekyll and Bundler.
Initial installation of dependencies
Open a terminal window, navigate to the publishing source for your site and install the application and its dependencies by running:
bundle install
Testing your additions/changes involves using Jekyll first to build the static site and then to serve it.
Initial build
- Run
bundle exec jekyll build
Serving the built static site
- Run
bundle exec jekyll serve
$ bundle exec jekyll serve
> Configuration file: /Users/octocat/my-site/_config.yml
>            Source: /Users/octocat/my-site
>       Destination: /Users/octocat/my-site/_site
> Incremental build: disabled. Enable with --incremental
>      Generating...
>                    done in 0.309 seconds.
> Auto-regeneration: enabled for '/Users/octocat/my-site'
> Configuration file: /Users/octocat/my-site/_config.yml
>    Server address: http://127.0.0.1:4000/
>  Server running... press ctrl-c to stop.
To preview your site, in your web browser, navigate to http://localhost:4000.
Committing and pushing changes
Again, there’s extensive documentation on using git and no lack of tutorials (e.g. git - the simple guide), so I’ll stick to the basics and use the absolute minimum.
Assuming, for the sake of example, that you have created a new test post a-new-blog-post.md in the _posts/blog/ folder:
Add the new file to the repository
$ git add _posts/blog/a-new-blog-post.md
After you have edited the changes to your satisfaction, you need to “commit” those changes the repository with an appropriate comment:
$ git commit -m "Added new test blog post" _posts/blog/a-new-blog-post.md
If that’s where you’d like to call a halt to your experiment with adding to/changing the web site content, just delete the publishing source folder (gapcoin-project.github.io) - it’ll leave no trace of the experimentation and it’s quick and easy enough to repeat the git clone and bundle install at a later point.
Otherwise, you need to “push” the new commit up the line to the cloneparent (your GitHub copy of the repository):
$ git push origin master
This will update your GitHub copy of the repository with your changes and position you to issue a “Pull Request”.
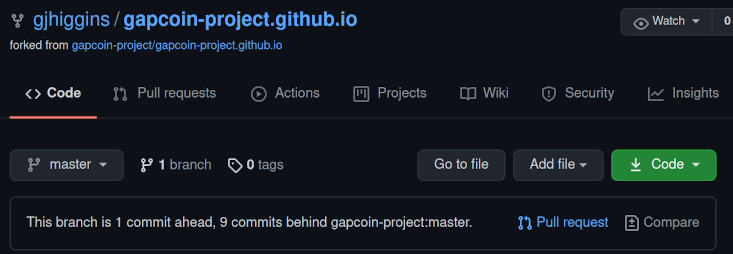
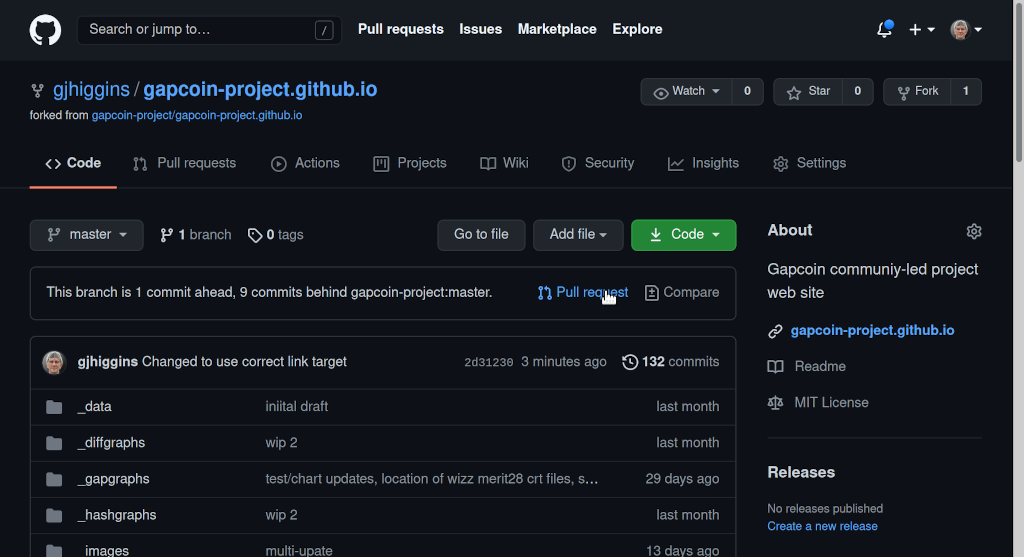
In the image below, Github reports that my fork of the community web site repository is one commit ahead of its forkparent and if I click on the “Pull request” link, I’ll be shown a web form for creating a Pull Request for the change I made. (You can click on the “Pull request” experimentally, even if there are no changes, as the web form will simply state that fact.)
If there are changes to be submitted to the forkparent in the form of a Pull request, the web GUI is very easy to navigate with large, prominent green buttons signposting the way (see below for examples).
My own approach
I’m a seasoned operator and have found Syntevo‘s free-to-use-for-FOSS Smartgit quite useful in assisting me. Here’s a sequence of screenshots taking me through the process of staging, committing and pushing a change and through the Github web GUI for creating a Pull Request for the change.
NB - the following screenshots are the GUI equivalent of the command line sequence:
git commit -m "Changed to use correct link target" _post/projectdocs/2014-12-16-starter-post.md
git push origin master
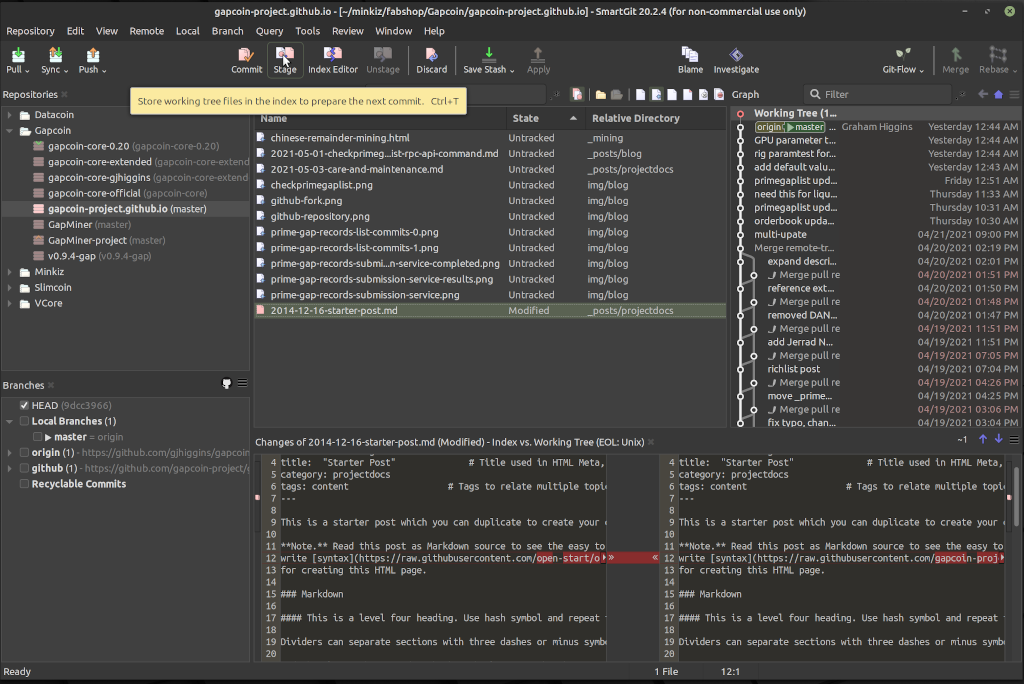
1. Staging the change
The changed file (2014-12-16-starter-post.md) is highlighted and the change (an updated link) is shown, it’s ready to be “staged”.
Also visible are the untracked files for this very post - “untracked” means that they have not yet been added with git add (the equivalent action in this GUI would be to select them and click the “Stage” button).
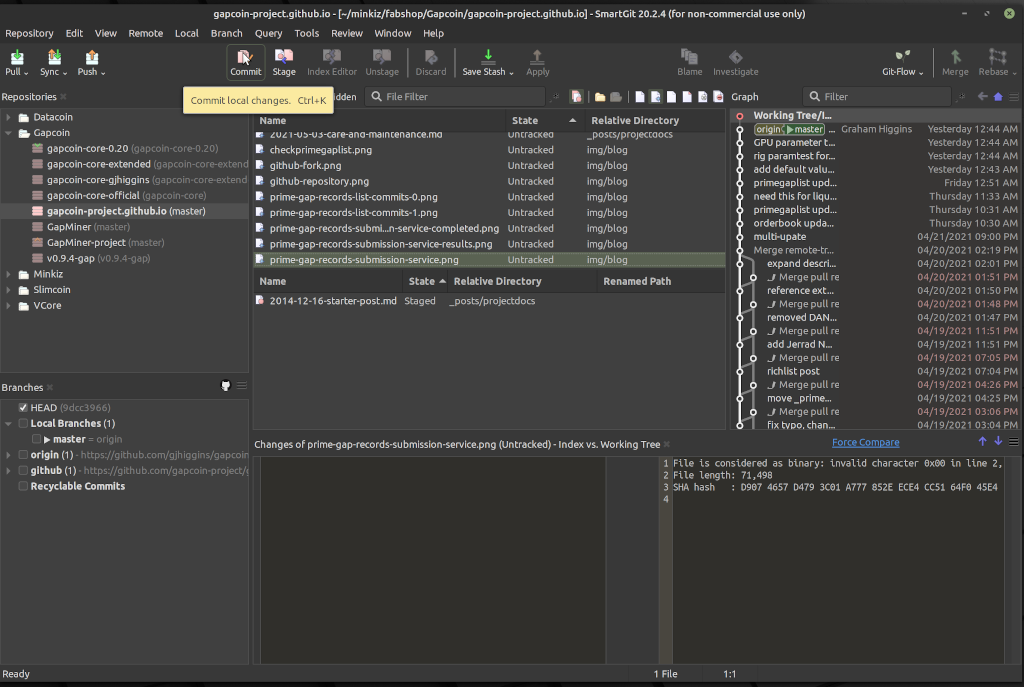
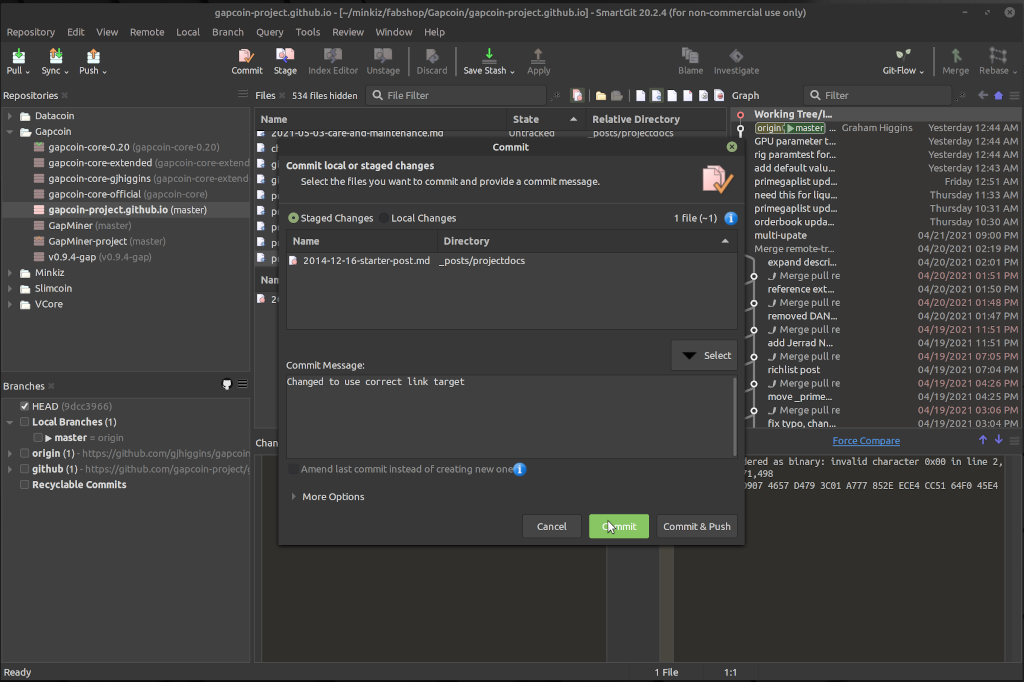
2. Committing the staged changes
The changed file (2014-12-16-starter-post.md) now appears in the staging area, its status has changed from “Modified” to “Staged”, i.e. the change is ready to be committed (unsuprisingly enough, by clicking the “Commit” button).
3. Confirming the commit and providing a commit comment
Do try and put some effort into creating a descriptive commit comment, it doesn’t help maintenance much if there‘s an interminable list of commits all commented with “Update”.
Note the shortcut “Commit & Push” button - it saves having to do steps 4 and 5:
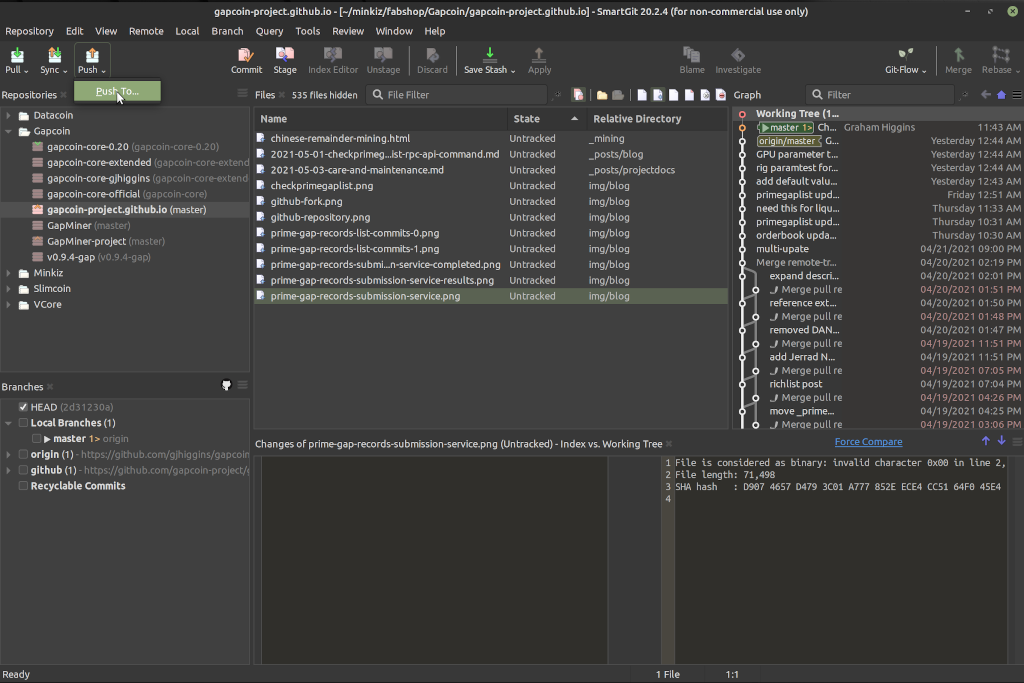
4. Push to the selected repository
Unfortunately, it doesn’t show you what’s to be pushed but if there are alternative repository destinations, you do get to choose where it’s going.
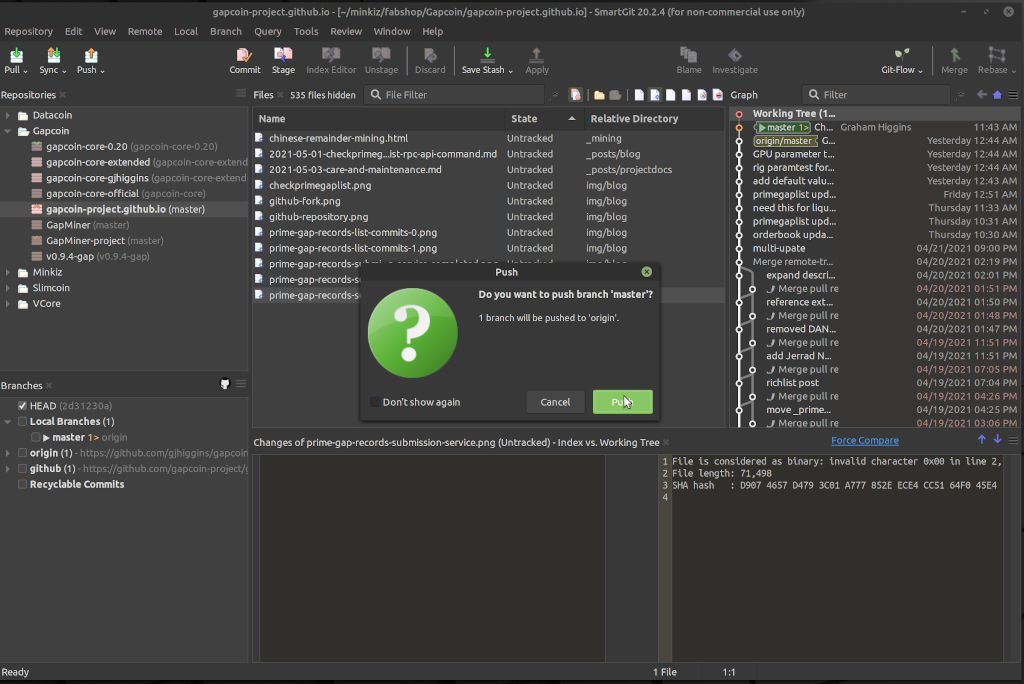
5. Confirm the Push to the selected repository
Note the lower-left pane, it shows two candidate repositories - the default “origin” (my copy on Github) and “github” (the forkparent in the Gapcoin Project area), the popup dialog is informing me that this push is going to be made to “origin” (which is where I want it to go).
Pull Requests
Conditions for a Pull Request
After the commit has been pushed to my copy of the community web site repository, the Github web GUI now informs me that my copy is one commit ahead of the forkparent.
This means that when I click on the “Pull request” link, I’ll be shown a web GUI form for creating a Pull request.
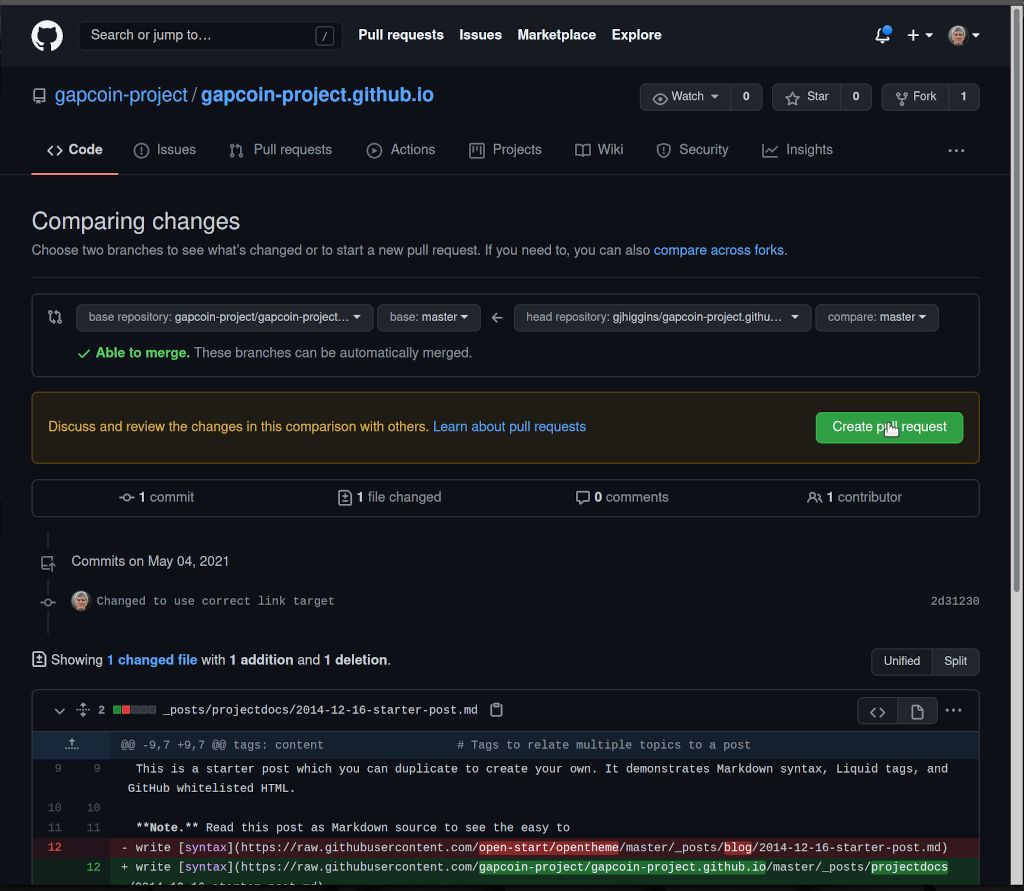
Creating the Pull Request
The web GUI form for creating a Pull request. Note the link offering help on learning about pull requests, it’s there if you need it.
The green “Able to Merge” status is important (at least to the maintainers of the community web site repository) because it indicates that no additional changes are required in order to accept this Pull Request.
You might want to double-check the changes that are being proposed. Not that it’s any big deal if things go astray, incorrect PRs can simply be closed by the maintainers.
Just hit the big green button and you’re (nearly) done.
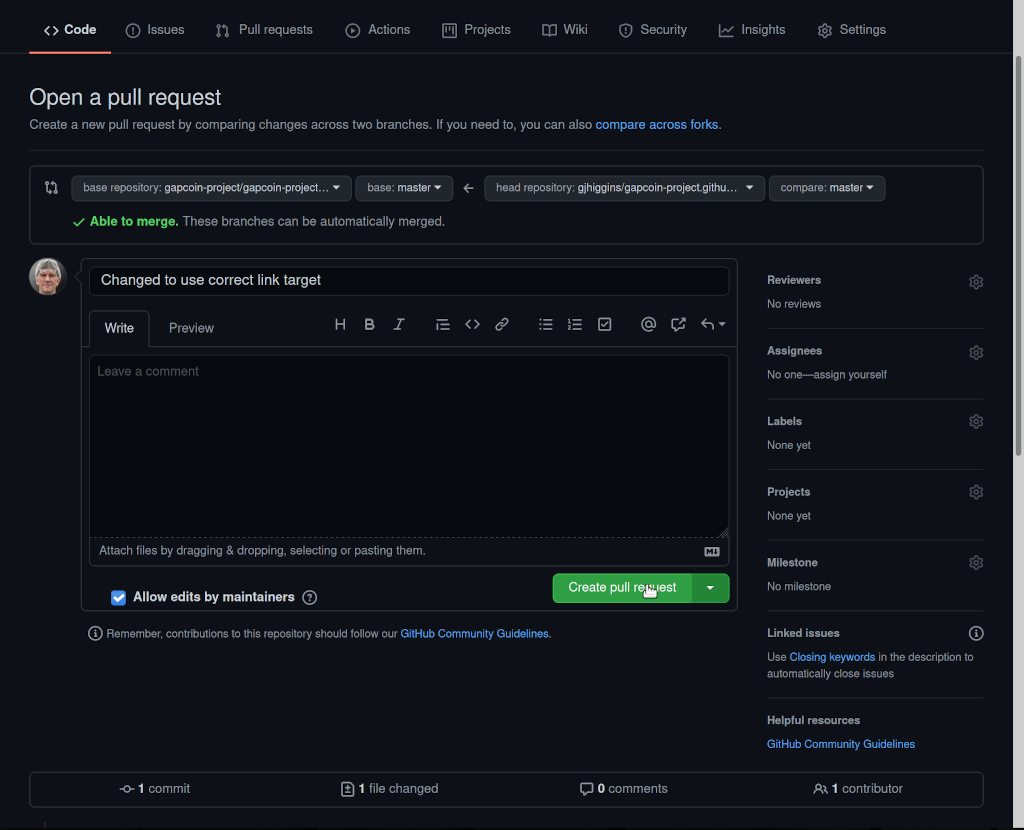
Confirming the Pull Request
Basically, just another big green button to hit. Unless you want to make some more detailed explanation of the changes/additions that this Pull Request is proposing (feel free).
That’s your job done. The rest is up to the maintainer(s) of the Gapcoin Project community web site repository.
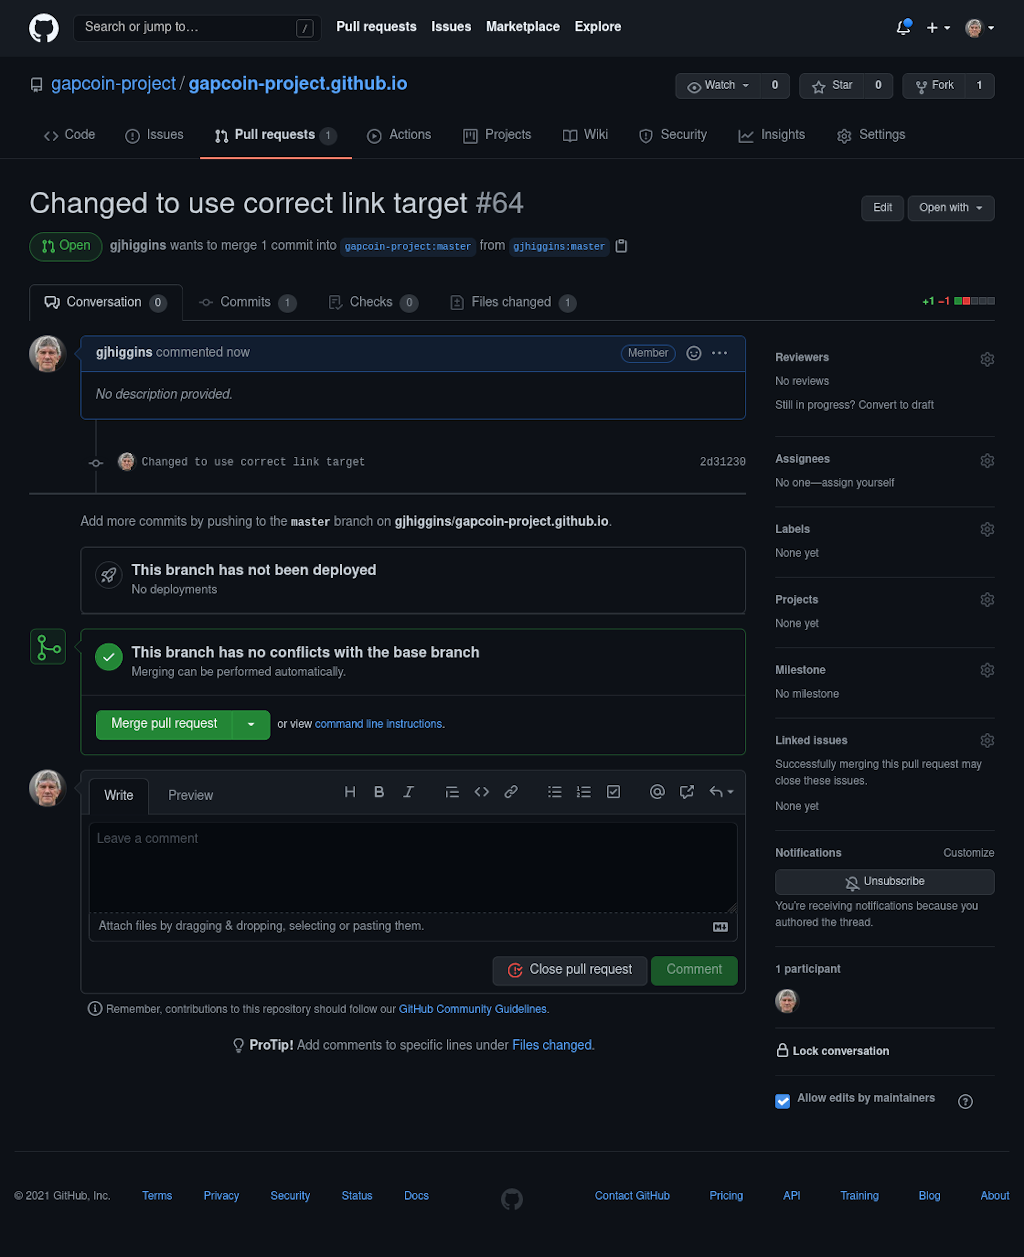
Accepting the Pull Request
And this is what a received PR looks like to one of (well, the only one of) the maintainers of the forkparent.
Again, usefully, just another big green button to hit - assuming that it’s a clean PR.
And, after a couple minutes, the Github-hosted Jekyll will have rebuilt the community web site reflecting the latest committed additions/changes. Job done.